
Fix Windows 11 Issues Quickly with the Integrated Troubleshooter
Windows 11 Integrated Troubleshooter

This powerful tool is designed to help you quickly identify and solve troubleshooting issues with all your Windows 11 devices. With the help of this comprehensive troubleshooting system, you can quickly diagnose and resolve any problems you might be having with your Windows 11 applications, hardware, and other components. We hope you find this troubleshooter helpful and enjoy using it to get your Windows 11 devices running smoothly.
Overview Of Windows 11 Integrated Troubleshooter
The Windows 11 Integrated Troubleshooter is an automated diagnostic tool designed to help users diagnose and resolve common PC issues. This tool is integrated into the Windows 11 operating system and can be accessed from the Control Panel. It works by automatically scanning your PC for potential issues, providing a list of possible solutions to the detected problems, and allowing you to choose the most suitable one.
Some of the issues it can detect include corrupt or missing system files, misconfigured settings, software incompatibilities, hardware malfunctions, and malware infections. The Windows 11 Integrated Troubleshooter is designed to be easy to use and it can be used to quickly resolve most common PC issues.
Benefits of Windows 11 Integrated Troubleshooter
1. Automatically finds and fixes common problems:
Windows 11's built-in troubleshooter automatically finds and fixes common problems that might be keeping you from using your device or its features. This is a great feature for people who don't know enough about computers to figure out how to fix problems on their own.
2. Better user interface:
In Windows 11, the troubleshooter's user interface has been changed to make it easier to use and get around. The interface not only has a long list of ways to fix problems, but it also has a list of solutions for each problem.
3. One-click repair:
Windows 11's built-in troubleshooter has a "one-click repair" feature that lets you fix common problems quickly without having to troubleshoot them by hand. This saves users time and effort and makes sure their device works at its best.
4. Automatically keeps your system up-to-date:
The built-in troubleshooter in Windows 11 automatically scans your system and downloads the latest updates to make sure that your device is running the latest version of Windows. This helps to make your device more secure, faster, and more stable.
5. Easy to use:
The Windows 11 troubleshooter is easy to use and understand, even for people who don't know much about computers. The troubleshooter walks you through the steps to figure out what's wrong and how to fix it, and it explains each step in detail.
How To Fix The Most Common Windows 11 Troubles
When users have problems with Windows 11, it gets in the way of their work, so Windows administrators need to find ways to fix Windows 11 desktops quickly and effectively.
But what should administrators do if their company just switched to Windows 11 and there isn't enough internal knowledge about how to fix the problem that the user is having?
In this case, the best way to troubleshoot Windows 11 might be to try to figure out what the problem is without knowing what it is. As a desktop administrator, you can fix almost any Windows 11 problem by following a set of steps in order. Even though you can't be sure that these steps will fix every Windows 11 problem, they tend to do so.
Step 1. Run Windows Update
The first thing you should do is launch Windows Update. Windows Update has gained notoriety as a means by which to install necessary security patches on Windows computers in recent years. Although Windows Update does fix security issues, it isn't its main function. Microsoft often provides bug fixes, which can be applied with this tool. It's conceivable that if you install all of the available updates, you won't experience the issue anymore.
Step 2. Make Sure The Pc Has Enough Space For Files
If running Windows Update doesn't fix the problem, you should check to see if the PC has enough space on its hard drive. In the past, Windows couldn't install updates if there wasn't enough space on the hard drive. More recently, though, Microsoft started setting aside space on the hard drive just for Windows Update to use. So, a PC with Windows 11 could be low on space even if you can install updates without any problems.
There should be no hard and fast rule about how much free space you need for Windows 11 to work. Most of the time, you need at least a few gigabytes of free space on your hard drive. If the PC doesn't have at least 10 GB of free space, you might want to free up any extra disc space you can.
Step 3. Run System File Checker
If the problem is still there, the next thing you should do is run System File Checker. This is a command-line tool that checks all the Windows system files to make sure they are correct. If one or more system files are broken or some of the files are the wrong version, Windows can have several problems.
Click the Start button and then the All Apps button to run System File Checker. Click Windows Tools next. When the Windows Tools screen comes up, right-click on the Command Prompt icon and choose Run as Administrator from the shortcut menu.
Step4. Start a troubleshooter
If you have already tried everything you can think of and the problem persists, then you should use a troubleshooter. Windows 11 has a lot of built-in troubleshooters that can fix a wide range of system problems automatically.
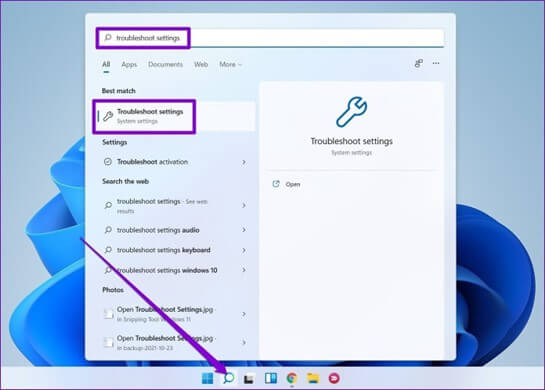
Click on the Settings icon to get to the troubleshooters in Windows. Select the System tab when the Settings page opens. Then, go through the list of options until you find the one that says "Troubleshoot." When you click on Troubleshoot, the Troubleshoot page will open. On that page, there are a few basic troubleshooting options for Windows, but it's usually best to ignore those and click on Other Troubleshooters instead. This brings up a screen with a long list of automated ways to fix problems.
The next step is to browse the list of troubleshooters to choose the one that most closely resembles the issue the PC is having. Click the matching Run button after finding a troubleshooter that seems to fit the situation. The troubleshooter is then started. Although each troubleshooter has a slightly distinct method of operation, they all generally employ a wizard-style user interface to lead you through a largely automated diagnostic and repair procedure.
Step 5: Revert The System.
Rolling the entire system back to an earlier point in time is a feasible solution if the Windows troubleshooters are unable to resolve the issue. Although it performs a good job, you can only utilize this option if System Protection is already turned on.
Right-click the Start button and select System to check the status of System Protection. Press the Advanced System Settings button when the System window appears. The System Properties sheet is then displayed. Make sure System Protection is turned on by selecting the System Protection tab. As it is turned off by default, someone would have had to intentionally switch this.
On the System Protection tab, near the top of the window, there is a System Restore button. But if System Protection is turned on and there is at least one restore point, you can use the System Restore button to take your computer back to a time before System Protection was turned on. This restore point would have to be from a time when the PC was working well. The System Restore feature is not meant to replace backups, but it does let you go back to a certain point in time in Windows 11.
Step 6: Restart The Pc All The Way.
Resetting the PC is the last thing you can do to fix the problem. Even though this choice works almost always, it should only be used as a last resort because it is harmful. When you reset your PC, Windows 11 is reinstalled from the beginning. At the very least, this means you have to reinstall all of the apps. This action can also delete information from the PC. Because of this, you should back up your files before you try to reset the PC.
To reset Windows 11, go to the Settings menu and click on the System tab. Now, click the Recovery option, and then click the Reset PC button. When you click the Reset PC button, you see a screen asking if you want to keep your files but lose everything else or if you want to get rid of everything on the PC.
Conclusion
Based on our analysis of the Windows 11 Integrated Troubleshooter, we can conclude that it is a powerful and versatile tool that can help users quickly solve a wide range of issues with their Windows system. Its intuitive user interface and comprehensive library of troubleshooting resources make it easy to identify and resolve any technical issue. Additionally, its support for third-party applications and hardware makes it possible to troubleshoot a variety of computer issues. With the help of the Windows 11 Integrated Troubleshooter, users can easily and quickly take care of any problems they may encounter.
For further blog posts see Ecokeys articles - Blog