
How to Create a Bootable Windows USB Drive Easily
How to Create a Bootable Windows USB introduction
Having a bootable USB drive is a lifesaver when it comes to installing or repairing your Windows operating system. Whether you're upgrading to the latest version or fixing a system crash, a bootable USB is an essential tool. In this guide, we'll walk you through the process of how to create a bootable Windows USB drive step by step, ensuring you have everything you need for a smooth installation.
System Requirements for Creating a Bootable Windows USB
Minimum System Requirements
Before diving in, ensure your system meets the basic requirements. You'll need a Windows PC, a USB drive with at least 8 GB of storage, and a stable internet connection to download the necessary files.
Recommended System Requirements
For the best experience, use a USB 3.0 drive or higher for faster data transfer. Additionally, a PC with a multi-core processor and at least 4 GB of RAM will speed up the process.
Preparing for the Process
Backup Your Data
Before making any major changes, back up your important data. This ensures you don't lose anything valuable if something goes wrong during the process. You can use external drives or cloud storage services like Google Drive or Dropbox for your backups.
Download the Windows ISO File
To create a bootable USB drive, you need the Windows ISO file.
Windows 11 - https://www.microsoft.com/en-us/software-download/windows11
Windows 10 - https://www.microsoft.com/en-
Official Microsoft Source
Download the ISO file from the official Microsoft website to ensure you're getting a legitimate copy.
Choosing the Right Version
Make sure to download the correct version of Windows that matches your product key and system requirements. Whether it's Windows 10 or Windows 11, getting the right version is crucial for a smooth installation.
Tools Needed for Creating a Bootable USB Drive
USB Drive Specifications
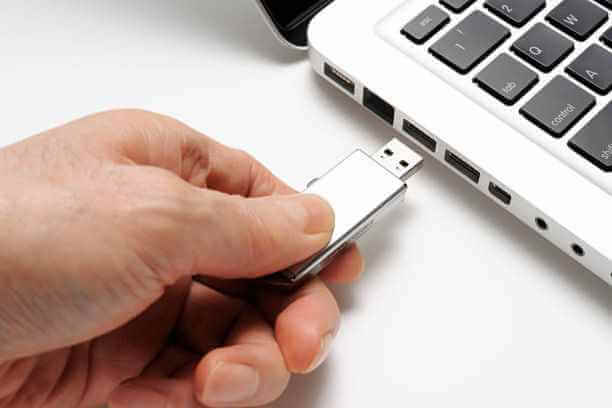
Ensure your USB drive has at least 8 GB of space. For a smoother and faster process, a USB 3.0 drive is recommended. This specification is important in the process of how to create a bootable Windows USB.
Software Tools
You'll need specific software to create the bootable USB drive.
Rufus
Rufus is a free, open-source tool that's widely used for creating bootable USB drives. It's fast and easy to use. https://rufus.ie/en/
Windows Media Creation Tool
This is an official Microsoft tool that simplifies the process of creating a bootable USB drive for Windows installations.
Creating a Bootable USB Drive with Rufus
Downloading and Installing Rufus
Visit the Rufus website and download the latest version. Once downloaded, run the installer and follow the on-screen instructions to install Rufus on your PC.
Steps to Create a Bootable USB Drive with Rufus
Selecting the ISO File
Open Rufus, insert your USB drive, and select the ISO file you downloaded earlier by clicking on the "SELECT" button.
Configuring Rufus Settings
Rufus will automatically configure most settings for you. However, ensure the "Partition scheme" is set to GPT if you're installing on a UEFI system, and MBR for BIOS systems.
Starting the Creation Process
Once everything is set, click on "START." Rufus will warn you that all data on the USB drive will be erased. Confirm and proceed. The creation process will take a few minutes.
Creating a Bootable USB Drive with Windows Media Creation Tool
Downloading and Installing the Tool
Go to the Microsoft website and download the Windows Media Creation Tool. Run the installer and follow the prompts to install it on your PC.
Steps to Create a Bootable USB Drive with Windows Media Creation Tool
Selecting the Windows Version
Launch the tool, select "Create installation media (USB flash drive, DVD, or ISO file) for another PC," and click "Next." Choose your preferred language, edition, and architecture (32-bit or 64-bit), then click "Next."
Configuring the Tool
Select "USB flash drive" as your media type and click "Next." Choose your USB drive from the list and click "Next" again. The tool will download the Windows files and create the bootable USB drive. Proper configuration is key in how to create a bootable Windows USB
Starting the Creation Process
The creation process will begin, and it may take some time depending on your internet speed and USB drive performance. Once completed, you'll have a bootable USB drive ready for Windows installation.
Troubleshooting Common Issues
USB Drive Not Recognized
If your USB drive isn't recognized, try using a different USB port or a different USB drive. Also, ensure your USB drive is properly formatted before starting the process.
ISO File Issues
If the ISO file is corrupted or not working, re-download it from the official source. Make sure to verify the file integrity using checksums provided by Microsoft. This step is crucial in how to create a bootable Windows USB without errors.
Bootable USB Drive Not Working
If the bootable USB drive doesn't work, double-check the BIOS/UEFI settings to ensure the USB drive is set as the primary boot device. Also, try recreating the bootable USB drive using a different tool.
Testing the Bootable USB Drive
Booting from the USB Drive
To test if the bootable USB drive works, insert it into your PC and restart the computer. Access the BIOS/UEFI settings and set the USB drive as the primary boot device. Save the changes and exit. Your PC should boot from the USB drive and start the Windows installation process.
Verifying the Installation Files
Once the system boots from the USB drive, verify that all installation files are present and correct. You should see the Windows setup screen, confirming that your bootable USB drive is working properly.
Conclusion
Creating a bootable Windows USB drive is a straightforward process with the right tools and guidance. By following the steps outlined in this guide, you'll have a reliable tool for installing or repairing your Windows system. Remember to back up your data, use the correct ISO file, and choose the appropriate tool for your needs. With these tips in mind, you'll be ready to handle any Windows installation with ease. This concludes the process of how to create a bootable Windows USB.
FAQs
Can I use any USB drive to create a bootable Windows USB?
It's recommended to use a USB drive with at least 8 GB of storage. For faster performance, use a USB 3.0 drive or higher. This is a key point in how to create a bootable Windows USB
How long does it take to create a bootable USB drive?
The time it takes to create a bootable USB drive depends on your internet speed and the performance of your USB drive. Generally, it can take anywhere from 10 to 30 minutes.
What should I do if the creation process fails?
If the process fails, ensure your USB drive is properly formatted and your system meets the requirements. Try using a different USB drive or software tool, and re-download the ISO file if necessary.
Can I use the bootable USB drive for multiple installations?
Yes, you can use the bootable USB drive to install Windows on multiple PCs. However, each installation will require a valid product key.
Is it possible to create a bootable USB drive for other operating systems?
Yes, you can create bootable USB drives for other operating systems like Linux or macOS using similar tools like Rufus or the appropriate software for those OS
For further blog posts see Ecokeys articles - Blog