
How to uninstall previous Microsoft Office versions
This article explains how to uninstall previous Microsoft office versions before installing a new office suite. It is always recommended to remove previous office versions when installing a new office suite. This saves space on your laptop/desktop and also saves confusion when opening your documents. Some issues can occur when activating your new office suite if previous suites are still installed on your machine.
Please note removing your old office suite will not affect any existing documents you have on your machine these will open once you install your new office suite. If you have created macros or rules for how outlook operates it is beneficial to back up your settings before removing them. This is covered in another article “backing up complicated office settings”
There are various ways you can remove Office from your machine, we have listed two popular ways to remove Office below.
- Via control panel – programs and features
- Via the official Microsoft office removal tool (recommended method)
Removing your office suite via control panel
Type “control panel” in the windows search box next to the start button – then click/select control panel (at the top of the results)
Next, we need to change the view to “large icons”
At the top of the screen next to “adjust your computer settings is “view by:” click the down arrow and select “large icons”
Your machine control panel should list settings in alphabetical order. Scroll down and select “programs and features”

On this screen it will list all your installed applications on your machine, you will need to scroll down and locate your current installed office suite(s) in the list.
Once located right click on the office suite and select uninstall

You will then get the below message click “uninstall”

The uninstall process will then begin
Once the uninstall completes the following screen will appear

You will see your office suite is no longer listed in programs and features; this confirms the suite has been removed from your desktop/laptop.
Restart your machine and go to the windows start menu, you will see the office suite is no longer showing and has been removed. You are now free to start your new installation of Office.
Removing Office using the Microsoft Office removal tool
Firstly, you need to download the tool from the link below – Copy/paste the below link into your browser address bar and press enter. You will then have instructions to download the tool depending on what web browser you use.
We use Firefox examples of instructions to install are listed below
Download the automated tool.
Select Save File, and then click OK.
From the upper-right of the Firefox browser window, select the downloads arrow and then select SetupProd_OffScrub.exe.
Select the version you want to uninstall, and then select Next.
Follow through the remaining screens and when prompted, restart your computer.
After you restart your computer, the uninstall tool automatically re-opens to complete the final step of the uninstall process. Follow the remaining prompts.
Locate the instructions for your browser and follow the download process.
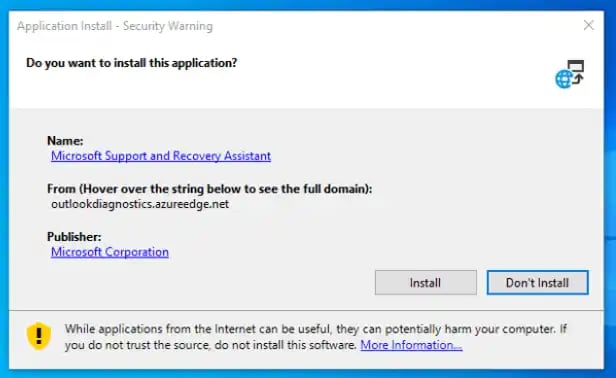
You will then be met with the following screen – click on “install”

Once installed there will be a privacy screen, click on “agree” to the privacy statement
Agree to make changes if prompted
You will then come to Select office versions to uninstall screen

Select the office versions you wish to uninstall
Confirm uninstall and put a tick in “I have saved all my work, closed all Office applications and stopped any set up program (make sure you have done this)

Then click “next”
The tool will then run through uninstalling the Office suite(s) you selected to remove you will then receive the following screen once complete
Click restart and your machine will reboot

Once restarted go to your windows start menu and you should see all the office icons have now been removed. To double check your office versions are fully uninstalled you can check in
Control panel – programs and features – your office suites should no longer be listed
This concludes 2 easy methods to remove previous office versions from your desktop/laptop. You are free to start your install of your new office suite.
You are welcome to uninstall the Microsoft office suite removal tool if no longer required.