How to Install Windows 11 from a USB Drive: Step-by-Step
To install Windows 11 from USB: back up your important files, confirm that the PC supports Windows 11, create official Microsoft installation media, boot the computer from the USB and follow Windows Setup.
A clean installation can remove personal files, applications and settings from the Windows drive. The most important parts of the process are choosing the correct Windows edition and selecting the correct drive or partition during Setup.
This guide covers the installation itself. If you still need to create the USB, use our separate bootable Windows USB guide first.
Before Installing Windows 11 from USB
Booting from Windows installation media is most commonly used when you want to:
- perform a clean Windows 11 installation;
- reinstall Windows on the same computer;
- install Windows after replacing the system drive;
- install Windows on a new compatible PC; or
- access Windows recovery and repair options.
A clean installation can erase personal files, installed applications, manufacturer customisations and settings from the selected Windows drive. Back up everything important before continuing.
1. Back up important files
Copy anything you cannot afford to lose to another device or trusted backup location.
This may include:
- documents and photographs;
- browser bookmarks;
- email archives;
- passwords and account information;
- software licence information;
- specialist application data; and
- drivers required for unusual storage or network hardware.
2. Check the current Windows edition and activation
If Windows is still running, open:
Settings > System > Activation
Record whether Windows is activated and whether the PC currently uses Windows 11 Home or Windows 11 Pro.
If you are reinstalling Windows on hardware that already has an appropriate digital licence, installing the same edition normally allows Windows to reactivate after the installation connects to the internet.
Not sure which edition or activation you have? Use our Windows Licence Finder before reinstalling or purchasing anything.
3. Confirm Windows 11 compatibility
Windows 11 requires compatible hardware including TPM 2.0, UEFI firmware with Secure Boot capability and a supported processor.
If there is any doubt, use our Windows 11 compatibility guide before beginning the installation.
4. Make sure the bootable USB is ready
You need Windows 11 installation media created from Microsoft's official Windows installation files.
If you do not already have it, follow our guide to creating a bootable Windows USB drive.
Do not start the installation until your backup is complete. Creating the USB and installing Windows are separate stages, and there is no benefit in rushing from one into the other.
How to Boot the PC from the Windows 11 USB
- Shut down the target PC.
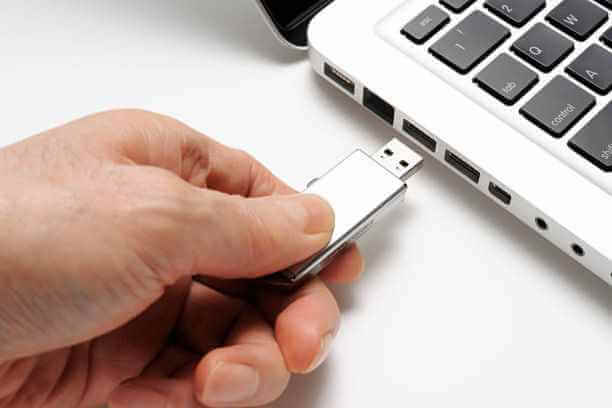
- Insert the Windows 11 USB.
- Switch the computer on.
- Immediately open the manufacturer's temporary boot menu.
- Select the USB device, preferably its UEFI entry where more than one appears.
- Wait for Windows Setup to load.
Common boot-menu keys include F12, F11, F9 and Esc, but the correct key varies between manufacturers.
If you are unsure, check the PC or motherboard manufacturer's instructions rather than repeatedly changing firmware settings.
The USB is ignored and Windows starts normally
This normally means the internal drive was selected before the USB.
Restart the computer and use the one-time boot menu again. There is usually no need to permanently change the entire boot order simply to install Windows once.
How to Install Windows 11 from USB
Step 1: Choose the language and keyboard

Select the appropriate language, regional settings and keyboard layout presented by Windows Setup, then continue.
Step 2: Start the Windows installation

Select the option to install Windows.
The exact wording and appearance of Windows Setup can change between Windows releases, so follow the current prompts displayed on screen.
Windows Setup may offer both installation and repair options. If you only intend to repair an existing Windows installation, do not continue into a clean installation unnecessarily.
Step 3: Enter the Windows product key when required

Windows Setup may ask for a product key.
If the PC already has a digital licence
If you are reinstalling the same Windows edition on the same activated hardware, you can normally select I don't have a product key where that option is provided.
Install the edition that was previously activated. Windows should attempt to reactivate automatically after installation once the computer is online.
If this is a new Windows licence
Enter the appropriate Windows product key when requested, or complete activation after Windows has been installed where Windows Setup permits this.
Step 4: Choose the Correct Windows 11 Edition

If Windows Setup asks you to select an edition, choose the edition that matches the licence or digital entitlement you intend to use.
Windows 11 Home
Select Home when the PC has a Windows 11 Home licence or an existing Windows Home digital licence.
Windows 11 Pro
Select Pro when the PC has a Windows 11 Pro licence or an existing Windows Pro digital licence.
Edition mismatch is a common activation problem. If a Home licence is available but Windows 11 Pro is installed, the Home licence will not activate that Pro installation.
Why is there no Home or Pro selection screen?
Some computers contain a Windows product key in their firmware. Windows Setup can detect that information and automatically select the corresponding edition.
For example, a PC originally supplied with Windows Home may automatically install Home without displaying an edition-selection screen.
If you genuinely need to move an activated Windows Home installation to Pro later, a valid Pro key can normally be entered through:
Settings > System > Activation > Change product key
For more detail about the editions, see our Windows 11 Home vs Pro comparison.
Step 5: Accept Microsoft's licence terms
Read the Microsoft Software Licence Terms displayed by Windows Setup.
If you agree to the terms, select the required acceptance option and continue.
Step 6: Choose the installation type
When performing a clean installation from bootable USB, select the option for installing a fresh copy of Windows rather than retaining the existing installation.
An in-place upgrade is different. If the aim is to upgrade Windows while retaining supported applications and personal files, Setup is normally started from within the existing Windows installation rather than by booting directly from the USB.
Step 7: Choose Where to Install Windows

This is the stage where the greatest care is required.
Windows Setup will display the drives and partitions it can see. Select the correct destination for the Windows installation.
Deleting or formatting the wrong partition can permanently erase files. Confirm the drive by its capacity and existing layout before changing anything.
Installing on a new empty SSD
A new drive may appear as Unallocated Space. Select the correct unallocated drive and allow Windows Setup to create the required system partitions.
Performing a completely clean reinstall
On a fully backed-up Windows system drive, experienced users may remove the existing Windows partitions and install to the resulting unallocated space.
Do not delete partitions on:
- secondary storage drives;
- external backup drives;
- manufacturer recovery partitions you intend to retain; or
- drives containing data you have not backed up.
Disconnect unnecessary drives where practical
If the PC contains several internal or external storage devices and you are uncertain which is which, disconnecting unnecessary drives before the clean installation can reduce the risk of selecting the wrong one.
Step 8: Allow Windows 11 to Install

Windows will copy the installation files, configure features and restart the computer several times.
Do not switch off the PC while Windows Setup is actively installing.
The installation starts again after the first restart
If the computer returns to the beginning of Windows Setup, it has probably booted from the USB again.
Allow the internal Windows drive to boot after the installation restart. Remove the USB when appropriate or use the boot menu to select the internal system drive.
Step 9: Complete Windows 11 Initial Setup
After installation, Windows will guide you through its initial setup screens.
This normally includes:
- confirming the country or region;
- choosing a keyboard layout;
- connecting to a network;
- signing in with the required Microsoft account;
- creating or confirming sign-in security;
- reviewing privacy choices; and
- allowing Windows to finish preparing the desktop.
Windows 11 Home and Windows 11 Pro for personal use require an internet connection and Microsoft account during Microsoft's normal initial setup process.
How to Activate Windows 11 After Installation
Once you reach the Windows desktop:
- Connect the PC to the internet.
- Open Settings > System > Activation.
- Confirm the installed Windows edition.
- Check the activation status.
If Windows activates automatically
No further activation action should be necessary.
This is common when the same Windows edition has been reinstalled on hardware that already holds an appropriate digital licence.
If you still need to enter a product key
Open:
Settings > System > Activation > Change product key
Enter the valid key for the edition installed.
For detailed activation steps, see our Windows 11 activation guide.
What to Do After Installing Windows 11
Do not consider the job finished as soon as the desktop appears.
- Open Settings > Windows Update.
- Select Check for updates.
- Install available Windows and driver updates.
- Restart the computer when required.
- Check Windows Update again after restarting.
- Open Device Manager and check for missing devices or warning symbols.
- Install manufacturer drivers where Windows has not supplied suitable ones.
- Confirm Windows activation.
- Reinstall trusted applications.
- Restore personal files from the backup.
- Create a new recovery and backup plan.
Check manufacturer drivers
Windows Update installs many drivers automatically, but some systems require manufacturer-specific software for:
- chipset devices;
- graphics hardware;
- Wi-Fi and Bluetooth;
- audio;
- touchpads and hotkeys;
- storage controllers; and
- specialist laptop or motherboard functions.
Use the PC, motherboard or hardware manufacturer's official support site rather than random driver-download websites.
Windows 11 USB Installation Troubleshooting
The PC will not boot from the USB
Try these checks:
- Use the manufacturer's temporary boot menu.
- Choose the UEFI USB entry where appropriate.
- Try another USB port.
- Recreate the installation media.
- Try another USB flash drive.
- Check that the computer supports UEFI and the required Windows 11 security features.
The Windows installer cannot see the SSD
This can occur when Windows Setup does not have the required storage-controller driver.
It is particularly common on some computers using Intel VMD, RAID or manufacturer-specific storage configurations.
Check the manufacturer's support page for the appropriate storage driver. Windows Setup includes a Load driver option on the disk-selection screen where an additional storage driver is required.
Do not randomly change RAID, AHCI or VMD firmware settings. Changing the storage-controller mode can stop an existing installation from booting and can affect access to existing data.
"This PC can't run Windows 11"
If Windows Setup reports a compatibility problem, check:
- TPM 2.0;
- Secure Boot capability;
- UEFI boot mode;
- processor compatibility;
- memory;
- storage; and
- graphics requirements.
Use our Windows 11 compatibility guide rather than immediately trying to bypass Microsoft's checks.
Windows 11 Home installs instead of Pro
The PC may contain a Windows Home product key in its firmware, causing Setup to select Home automatically.
Allow Home to complete installation and activate where appropriate. If you have a valid Windows Pro licence and genuinely need Pro, use:
Settings > System > Activation > Change product key
to perform the edition upgrade.
The product key is not accepted
First confirm:
- the exact Windows edition installed;
- the exact edition the key is intended for; and
- the full activation error code.
Then use our Windows product key not working guide.
The installation keeps restarting from the beginning
The computer is probably booting from the USB after every restart.
Once Windows has copied the files and restarts, allow the internal system drive to boot rather than starting again from USB.
Windows Setup freezes or displays an error
Try:
- disconnecting unnecessary peripherals;
- recreating the Windows USB;
- using a different USB drive;
- using another USB port;
- checking the memory and SSD for hardware faults;
- installing current motherboard or PC firmware where appropriate; and
- recording the exact Windows Setup error before troubleshooting further.
Clean Installation vs In-Place Upgrade
Clean installation from USB
Useful when installing Windows on a new drive, starting again from scratch or dealing with an installation that cannot sensibly be repaired.
Important: personal files, applications and settings on the selected Windows installation can be removed.
In-place upgrade
Used when upgrading or reinstalling from within a functioning Windows installation while retaining supported files and applications.
Usually started by: running Windows Setup from inside Windows rather than booting directly from USB.
Installing Windows 11 from USB: Final Checklist
- Important files have been backed up.
- The target PC is compatible with Windows 11.
- The bootable USB was created from official Microsoft files.
- You know whether Windows Home or Pro is required.
- You have recorded the existing activation status where possible.
- You know which physical drive Windows should be installed on.
- Unnecessary external storage has been disconnected where practical.
- You understand that deleting or formatting partitions can permanently erase data.
Taking a few minutes to verify those points is much safer than trying to correct the wrong edition, drive or partition after Windows Setup has already started.
Frequently Asked Questions
How large should the USB drive be for Windows 11?
Use a blank USB drive with at least 8 GB of storage when creating standard Windows installation media. Existing files on the selected USB are erased during creation.
Will installing Windows 11 from USB delete my files?
A clean installation can remove personal files, applications and settings from the Windows drive. Create a complete backup before beginning.
Can I reinstall Windows 11 without entering a product key?
If the same Windows edition was already activated on the same PC through an appropriate digital licence, you can normally select the option indicating that you do not have a product key and allow Windows to reactivate after installation.
Should I install Windows 11 Home or Pro?
Install the edition that matches the PC's existing digital licence or the Windows licence you intend to use. Home and Pro are different editions and activation depends on the correct licence being used.
Why does Windows Setup automatically install Home?
The computer may contain a Windows Home product key in its firmware. Windows Setup can detect that key and select Home automatically.
Can Windows 11 Pro be installed after Home?
Yes. An activated Windows 11 Home installation can normally be upgraded to Pro by entering a valid Windows 11 Pro key through Activation settings.
Why can't Windows Setup see my SSD?
The computer may require a manufacturer storage-controller driver, particularly on systems using RAID or Intel VMD. Obtain the correct driver from the PC or motherboard manufacturer and use the Load driver option during Setup.
Why does the Windows installer keep starting again?
The computer is probably booting from the USB again after restarting. Allow the newly installed Windows drive to boot instead of selecting the USB again.
Can I install Windows 11 on unsupported hardware?
Windows 11 should normally be installed only on hardware that meets Microsoft's requirements. Bypassing the checks does not make unsupported hardware officially supported and can create compatibility and servicing problems.
What should I do after Windows 11 is installed?
Run Windows Update, install required manufacturer drivers, check Device Manager, confirm Windows activation, reinstall trusted applications and restore personal files from your backup.